The most useful measurement on a tile chisel is often the one at the opposite end from the blade. A wide scraping edge can look right for a floor-removal project, but it is of little use if the shank does not fit the hammer. SDS-Max, SDS-Plus and a 30 mm hex connection are different systems. Start with the tool holder, then consider blade width, length and the surface you need to remove.
Our range includes a 4-inch tile chisel with a 30 mm hex shank and a 6-inch SDS-Max tile chisel. They serve related floor-preparation tasks, but they are not interchangeable accessories. The narrower model is 16 inches long; the wider SDS-Max model is 15 inches long. Those dimensions help you compare access and working width after compatibility is established.
This guide explains how to make that comparison, organize the project and assess the floor before removing anything. It does not replace the instructions for your hammer, the flooring system or any required hazardous-material assessment. A careful start protects both the equipment and the part of the floor that you intend to keep.
Identify the hammer before shopping for a bit
Find the exact model number on your hammer and locate its accessory specification. Do not rely on a retailer category such as rotary hammer or demolition tool. Those labels describe broad tool families, not a particular fitting. Two tools from the same manufacturer can use different accessory systems, and two similar-looking machines may have very different limits.
Check the manual for the tool-holder type, allowed accessory dimensions and operating modes. A rotary hammer may offer more than one mode, while an accessory intended for scraping requires the mode specified by the tool manufacturer. The presence of a selector switch does not prove that every position is suitable for every attachment. Resolve that detail before the chisel is installed.
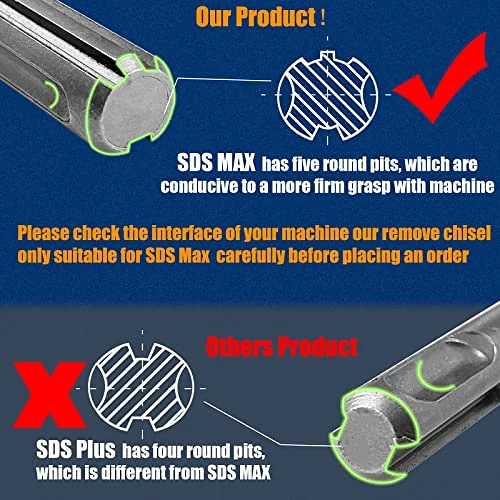
An accessory that already fits can provide a useful visual reference. Compare its shank shape, retaining features and dimensions with the proposed replacement, while still using the manual as the authority. A photograph is helpful for identifying a question, but it is not a dimensional drawing. If the connection remains uncertain, ask for a model-specific answer rather than guessing from the product name.
Keep the model information with your shopping notes. That prevents a later purchase from being based on a half-remembered measurement. A simple record saying which hammer you own, which interface it uses and which accessories have been confirmed compatible can save a return and a delayed project.
Separate SDS-Max, SDS-Plus and hex fittings
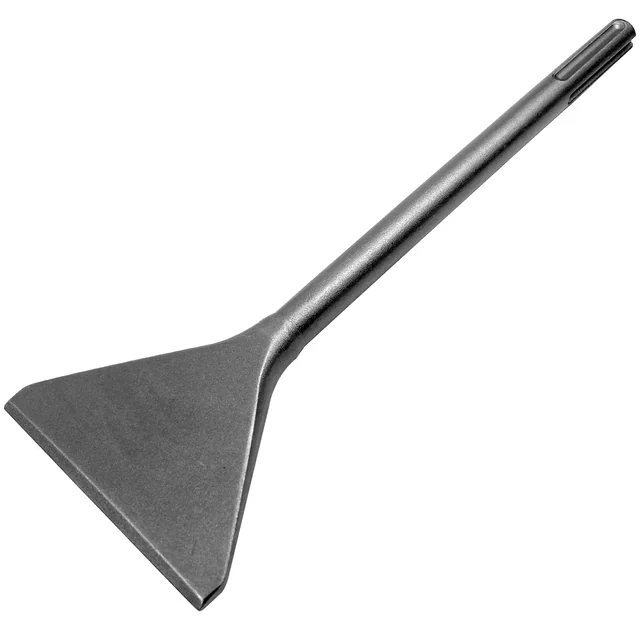
SDS-Max and SDS-Plus are distinct attachment systems. A product marked SDS-Max should not be selected for an SDS-Plus tool merely because both names begin with SDS. The connection geometry and tool requirements differ. Our 6-inch tile chisel is the SDS-Max option; it is not a direct-fit SDS-Plus accessory.
The 4-inch JACKCHEN tile chisel uses a 30 mm hex shank. Its fit depends on the correct hex tool holder and retaining arrangement. This is a separate decision from choosing the 6-inch SDS-Max blade. A measurement that sounds close in inches or millimeters does not establish that the retention features will engage correctly.
Do not force an accessory into the holder or alter its shank to make it fit. If a new bit does not seat and lock through the normal procedure, stop and inspect the model match and condition. Manufacturing damage, debris or a mismatched fitting can all produce a problem, and powering the tool is not a useful diagnostic for an insecure attachment.
Adapters, where available, must be specifically approved for the tool and accessory arrangement. They can change the permitted use or working dimensions. This guide does not assume that an adapter makes the two JACKCHEN chisels interchangeable. Choose a directly compatible accessory unless the equipment manufacturer has provided a clear approved alternative.
| Accessory | Connection | Working width | Overall length | First compatibility check |
|---|---|---|---|---|
| JACKCHEN tile chisel | 30 mm hex | 4 in | 16 in | Matching hex holder and retention |
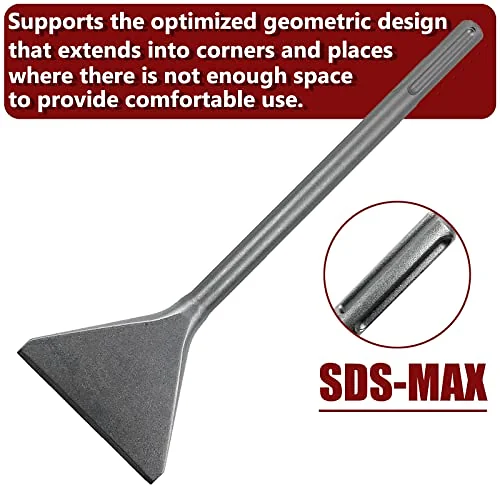
| JACKCHEN wide tile chisel | SDS-Max | 6 in | 15 in | SDS-Max tool specification |
| JACKCHEN tamper attachment | 30 mm hex | 6 × 6 in plate | Check the selected assembly | Approved hammer and tamping use |
Choose blade width for the space
A wider edge can work across a broader strip of material, but width alone does not make an accessory better for every floor. The room layout, access, material bond and hammer guidance all matter. A six-inch blade may suit an open area, while the same blade can be awkward around a pipe, a threshold or a narrow strip beside a wall.
The four-inch chisel gives a narrower working edge within its compatible hex system. The six-inch SDS-Max chisel offers more width within a different system. Because the fittings differ, these are not simply small and large versions for the same machine. First establish which system you have, then decide whether the available width makes sense for the work.
Consider the surface beneath the tile. If you intend to preserve a concrete base or another substrate, control and approach matter more than covering the largest possible area in one movement. A wider edge can still damage the surface if used incorrectly. Follow the tool and flooring guidance, and assess a small suitable area before committing to the whole room.
Think about the final stages as well as the open center of the floor. Edges, corners and transitions may require a different approved accessory or another method. You do not need to make a wide powered chisel perform every detail task. Planning those transitions in advance makes the equipment choice more realistic.
Length affects access and handling
Overall length determines where the working edge sits relative to the tool, but it should not be treated as a simple longer-is-better feature. The position of the hammer, the available space and the operator's stance all change how an accessory feels in use. Choose within the dimensions allowed by the tool manufacturer and the conditions of the project.
Our four-inch hex chisel is listed at 16 inches overall, while the six-inch SDS-Max chisel is listed at 15 inches. These measurements help identify the selected items and plan clearance. They do not establish that either tool can be used from any posture or at any angle. The equipment instructions govern the working arrangement.
Check the space under cabinets or near fixed fixtures before assuming the assembly will reach. A blade may fit into a gap while the hammer body or handles do not. Account for the complete machine, the operator and the movement needed to work in a controlled way. If access is too restricted, use an appropriate alternative method.
Do not use an accessory as an improvised lever or extension. Impact tools and chisels are designed for particular loading and retention conditions. Side loading or forcing a long bit through a difficult gap can introduce stresses that the visible blade dimensions do not describe. If the planned use is not covered by the instructions, choose another approach.
Understand what you are removing
Tile, thinset and other bonded flooring layers can behave differently. A tile may separate while the adhesive remains, or the surface beneath it may come away with the tile. Before selecting a removal method, identify the layers and decide which ones are supposed to remain. This avoids buying an accessory around a task that changes as soon as work starts.
Look at an accessible edge or an existing damaged area where it is safe and appropriate to do so. Check the project documents if available. The goal is to understand the assembly, not to start destructive investigation without a plan. If the materials are old or unknown, arrange the assessment needed before disturbing them.
Older flooring and adhesives can contain hazardous materials. Do not use appearance alone to declare them safe to break, scrape or grind. If asbestos or another hazard may be present, stop and use a qualified assessment and removal process. Choosing a different chisel does not make an unidentified material safe to disturb.
Also consider what lies below the floor. Heating elements, pipes, cables and waterproofing can be damaged during removal. A surface that looks like ordinary tile may be part of a more complicated system. Identify those features and the intended repair method before using an impact tool.
Set a realistic goal for the substrate
Removing tile is not the same as preparing a surface for the next floor covering. The new flooring or adhesive may require a particular flatness, cleanliness or surface condition. A chisel can help remove material, but it does not certify that the substrate meets the next system's requirements. Read those requirements before deciding when removal is complete.
Keep the demolition goal separate from the finishing goal. You may first need to remove the old tile, then address bonded residue, damaged areas or uneven spots through an approved preparation method. If you expect one wide blade to deliver a ready-to-install surface in every situation, you may overlook necessary repair or preparation steps.
Avoid removing sound material merely to chase a uniform appearance. The appropriate remaining surface depends on the next installation. Consult the flooring and setting-material instructions, particularly where a membrane or moisture-control layer is involved. An attractive-looking base can still be unsuitable, while a visually uneven color may have no bearing on the required performance.
Document any damage or unexpected layer as it appears. Photographs and short notes can help a flooring professional assess what needs to happen next. This is more useful than covering the area quickly and discovering a problem after the new finish is installed.
Plan dust control before the first impact
Breaking or scraping mineral-based materials can generate hazardous dust. The absence of a large visible cloud does not establish that the air is safe. Choose the control method required for the material, tool and work conditions, and use equipment designed to work together. A household cleanup plan is not a substitute for a suitable dust-control arrangement.
For work involving crystalline silica, consult the applicable OSHA construction guidance and the tool manufacturer's instructions. The correct requirements depend on the task and setting. This guide does not claim that one attachment, mask or vacuum establishes compliance for every floor-removal project.
Protect other occupants and adjoining areas through the appropriate work-area plan. Think about doorways, ventilation paths and the movement of people carrying debris. Dust can travel beyond the patch of floor being removed. Where professional containment or assessment is needed, arrange it before starting instead of trying to solve the issue after the room is disturbed.
Cleanup methods matter too. Follow the applicable guidance for collecting debris and residual dust without putting it back into the air. Keep suitable containers and a clear disposal route ready. The accessory purchase is only one part of the preparation budget; controls, cleanup and disposal need space in that budget as well.
Prepare the room around the work
Remove items that block access or can be damaged, and protect the parts of the room that remain. Plan where the tool can be set down safely, how power will reach the work and where debris will be collected. A clear floor at the beginning can become cluttered quickly once tile fragments start to accumulate.
Keep the cable route away from sharp debris, water and the working edge. Use the electrical arrangement specified for the hammer and site. Do not assume an extension cord is suitable because its plug fits. Its length, rating, condition and environment all matter, and the tool instructions should guide the choice.
Identify a manageable sequence through the space. You need a way to leave the work area without crossing unstable debris or stepping over an active tool. Consider how bags or containers will be moved and avoid filling them beyond safe handling limits. Heavy broken material can turn cleanup into the most demanding part of the job.
If others are present, agree on a controlled work zone and communication. Noise and hearing protection can make casual conversation ineffective. Nobody should approach the blade area or move material while assuming the operator has noticed them. A deliberate pause is preferable to an uncertain hand signal beside a powered tool.
Inspect and fit the chisel correctly
Before installation, compare the received item with the selected model and inspect it for visible damage. Confirm the shank type, working dimensions and condition of the retaining area. Keep the packaging and order details until any mismatch is resolved. A product title cannot override a different or damaged component in the box.
Disconnect the tool from its power source before fitting or removing an accessory. Follow the manufacturer's procedure for cleaning, lubrication where specified, insertion and retention checks. Use only the materials and amounts called for in those instructions. Adding an improvised lubricant or skipping a required step can create a problem even with the correct shank.
Check that the accessory seats and locks normally. If it does not, stop. Do not hammer the shank into place, modify the retaining features or run the machine in the hope that it will settle. Compare the model and condition, and use the purchase support options if the item appears incorrect or defective.
Our customer-review section includes a report from a buyer whose SDS-Max chisel would not seat in his tool while other SDS-Max accessories did. That report is useful as an inspection reminder, not proof that every matching model will have the same issue. Check the actual accessory and tool together before beginning a room-sized project.
Work with feedback from the surface
Use the operating method and mode prescribed for the hammer and accessory. Pay attention to how the material releases and to the condition of the surface you intend to retain. If the result differs from the plan, stop and reassess rather than increasing force automatically. A stubborn patch may require a different approved method or a better understanding of the floor assembly.
Do not interpret every change in sound or movement as normal progress. An unexpected obstacle, insecure accessory or damaged substrate deserves inspection. Stop the tool and isolate its power before checking the working area as appropriate. The aim is to understand the change while keeping control of the equipment and surroundings.
Manage the removed material as you go. Debris around the working area can affect footing and hide the surface. Keep the route clear through the suitable collection method, and pause before the accumulation becomes difficult to handle. Trying to finish a section through a pile of fragments can make precise work harder.
Take the handling demands seriously. Tool weight, vibration, noise and the working position all contribute to fatigue. Follow the equipment guidance, use appropriate protective equipment and plan breaks. A wide blade is not a reason to extend a session beyond the point where you can maintain a stable, controlled position.
Know when a tamper is a separate choice
The 6 × 6-inch tamper plate with a 30 mm hex shank is a different accessory for a different task. It presents a flat plate for compacting suitable loose material with an approved hammer. It is not a tile-removal blade, and its shared nominal hex size does not make every use of the chisel and tamper interchangeable.
If a project moves from demolition to rebuilding a granular base, the compaction requirements should come from the project design. Plate size alone does not establish the density or load-bearing result. The material, layer thickness, moisture and approved equipment all affect the method. Use a qualified specification where the base supports a structure or a critical surface.
Check that the hammer allows the attachment and intended operation. Compare the shank and retaining arrangement, and inspect the plate assembly before use. A fitting that looks similar should receive the same careful model check as a new chisel. The accessory belongs in the plan only if both the connection and task are appropriate.
Keep tamping and scraping accessories separately identified in storage. That makes their different purposes clear to the next person using the equipment. A workshop with several heavy steel attachments benefits from labels and model records, especially when tools are used only occasionally.
Compare the full cost of the project
The chisel price is easy to compare, but it is rarely the whole cost of floor removal. Include the compatible hammer, dust controls, protective equipment, material assessment where needed, waste handling and the preparation required for the next floor. A low-cost accessory can still be part of a project that needs professional equipment or help.
Consider whether owning or renting the hammer makes sense. If you already have a suitable tool, a compatible chisel may be a straightforward addition. If you do not, compare the complete arrangement with a rental or contractor option. Do not select an unfamiliar hammer only because it fits an inexpensive bit you have already purchased.
Time should be estimated for the whole sequence: preparation, controlled removal, cleanup, inspection and any repairs. Avoid building a schedule around a customer's unusually fast result. Reviews can describe individual experiences, but the room, floor assembly and operator may be very different from yours. Plan enough flexibility to handle what is found beneath the tile.
Before checkout, confirm the selected interface and dimensions one more time. The JACKCHEN chisel and tamper collection groups the available attachments, with the connection stated in each product name. Keep the hammer model beside that page while making the comparison.
Keep a receiving checklist
Before the delivery arrives, write down the selected chisel name, interface, width and length. Add the exact hammer model and any written fit confirmation. Compare the received accessory with that list before discarding packaging or beginning the project. A short checklist makes it easier to notice a different size or configuration while the order details are still close at hand.
Separate a product mismatch from a project change. The correct accessory may arrive, but the floor assessment may reveal that a different removal method is needed. In that case, reconsider the work before opening a larger area. The fact that a purchase was carefully chosen does not make it suitable for conditions that were unknown when it was ordered.
If you need help from the seller, describe the specific problem and include the model information. “The shank does not lock in this exact tool” is more useful than “the bit does not work.” Follow the support process attached to the order and keep the item unmodified while the issue is assessed.
Store the accessory for the next job
After use, follow the tool and accessory instructions for cleaning and storage. Let components cool as required before handling, inspect for damage and keep the shank and working edge protected from accidental knocks. Do not return a visibly damaged accessory to a mixed box where someone may mistake it for a ready-to-use part.
Record any fit issue or unusual behavior with the model information. A short note can prevent the next project from beginning with the same unanswered question. If an accessory needs replacement, retain enough detail to identify the correct system rather than ordering from a photograph alone.
For a job that also involves cutting a slab or masonry edge, read our concrete-cutting planning guide. Cutting and scraping are different operations with their own equipment and controls. Choose each tool around its task, and let a confirmed fit be the starting point for every accessory purchase.